How to Convert a Metal Shed into a Metal Chicken Coop: A Comprehensive Guide
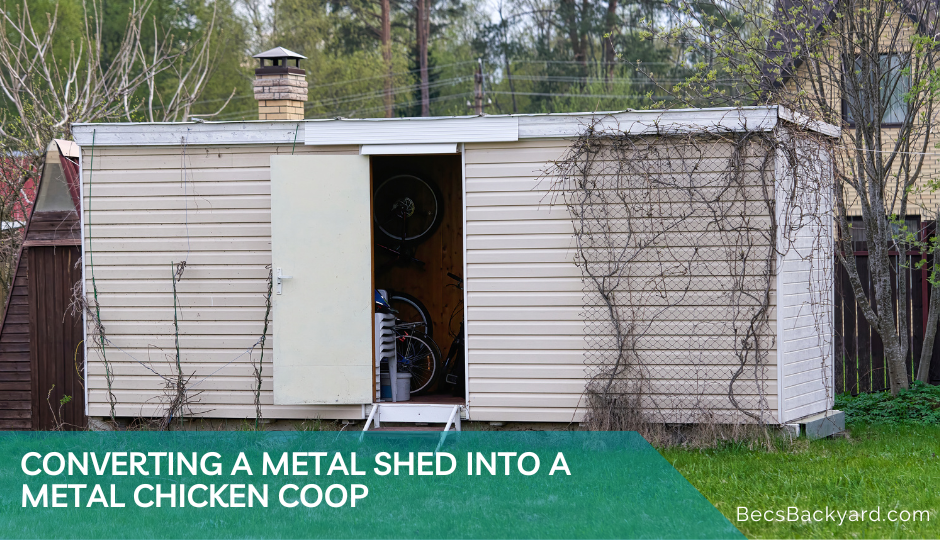
Welcome to our comprehensive guide on converting a metal shed into a functional and durable metal chicken coop.
Converting an existing structure not only saves costs but also repurposes an unused space. In this blog post, we will provide a detailed step-by-step outline to help you successfully transform your metal shed into a cozy and secure home for your feathered friends, ensuring their safety and comfort.

Planning
Before diving into the conversion process, thorough planning is essential to ensure a successful outcome. Consider the following crucial aspects:
Measuring and Capacity
Start by measuring the dimensions of your metal shed. This step allows you to determine how many chickens the shed can comfortably accommodate. Remember to provide sufficient space for the chickens to move around freely and access their essentials, such as food and water.
Materials Needed
Create a comprehensive list of the materials required for the conversion. This may include wire mesh for enclosures, wood for framing and construction, nesting boxes, roosts, feeders, ventilation systems, insulation, and any other necessary items. Gathering all the materials beforehand will save you time during the conversion process.
Preparing the Shed to be a Metal Chicken Coop
Preparing the shed properly ensures a clean and safe environment for your future chicken coop:
Cleaning and Disinfecting
Empty the shed completely and give it a thorough cleaning. Remove any dirt, debris, or potential hazards that might be present. Once cleaned, disinfect the space to eliminate any harmful pathogens that could affect the health of your chickens. A clean environment is vital for their well-being.
Sealing Gaps and Holes
Inspect the shed carefully for any gaps or holes that may compromise the security of the coop. These openings can serve as entry points for predators or pests. Seal them using appropriate materials such as caulking or weather-stripping, ensuring your chickens’ safety.
Converting the Metal Shed : Building the Coop
Installing Roosts
The purpose of a roost in a chicken coop is to provide a raised perch for chickens to sleep on at night. Chickens naturally seek out high spots for sleeping in the coop, even if there are no predators. By providing a roost, you are giving your chickens a comfortable and safe place to rest at night. Additionally, roosting perches are an important part of the “pecking order” among chickens, as hens higher up in the pecking order will get the higher spots in the roosting perches.
- Choose the Right Material The first step to making chicken coop roosts is to choose the right material. You can use any sturdy and untreated wood, such as pine or cedar, to make the roosts. Avoid using pressure-treated wood, as it contains chemicals that can be harmful to your chickens.
- Cut the Wood Once you have decided on the material, cut the wood into the desired length and width of the roosts. The ideal width for a chicken roost is around 2-3 inches, as this allows your chickens to comfortably grip the roost with their feet. The length of the roost will depend on the size of your coop and the number of chickens you have.
- Sand and Smooth the Edges After cutting the wood, sand and smooth the edges to prevent your chickens from getting splinters. You can use sandpaper or a sander to achieve a smooth finish.
- Install the Roosts – attach them securely to the walls of the coop using screws or nails. The roosts should be installed at a height of at least 18 inches from the ground, as this will prevent your chickens from sleeping on the ground and reduce the risk of disease. You can also install multiple roosts at different heights to accommodate chickens of different sizes.

Nesting Boxes
The best place to put the nesting box for chickens is in a quiet and dark area of the coop, away from the roosts. This will provide your hens with a calm and private environment to lay their eggs. Additionally, the nesting boxes should be placed at a height of around 18 inches from the ground, as this will keep them clean and reduce the risk of disease
- Determine the Right Size The first step to creating nesting boxes for chickens is to determine the right size. The size of the nesting box will depend on the size of your chickens. Standard-sized chickens will fit very nicely in a 12”x12”x12” inch box, while bantam chickens can have smaller boxes of 10”x12”x10”. Larger breeds such as Jersey Giants will need slightly more room at 12”x14”x12”. Each nesting box should only accommodate one hen.
- Choose the Right Material Next, choose the right material for the nesting boxes. You can use any sturdy and untreated wood, such as pine or cedar, to make the boxes. Avoid using pressure-treated wood, as it contains chemicals that can be harmful to your chickens.
- Cut the Wood Once you have decided on the material, cut the wood into the desired length and width of the nesting boxes. The ideal size for a nesting box is around 12 inches cube, 12 inches tall, wide and deep for standard-sized chickens. Larger birds such as Jersey Giants will need 12 inches deep, 14 inches wide, and 12 inches tall.
- Assemble the Boxes After cutting the wood, assemble the boxes using screws or nails. You can add a hinged lid to make it easier to collect the eggs and clean the boxes. You can also add a lip or a perch to the front of the box to prevent the bedding material from spilling out.
- Install the Boxes To install the nesting boxes, attach them securely to the walls of the coop using screws or nails. The boxes should be installed at a height of around 18 inches from the ground, as this will keep them clean and reduce the risk of disease. You can also install multiple nesting boxes to accommodate the number of chickens you have.

Ventilation System
The purpose of having ventilation in a chicken coop is to ensure that the air inside the coop is fresh and circulating properly. Ventilation serves several important purposes, including:
- Providing fresh air for healthy breathing: Chickens need fresh air to breathe, just like humans do. Proper ventilation ensures that the air inside the coop is not stale or stagnant, which can lead to respiratory problems in chickens.
- Removing moisture: Chickens produce a lot of moisture through their droppings and respiration. If this moisture is not properly ventilated out of the coop, it can lead to dampness, which can in turn cause mold growth and other health problems for your chickens.
- Preventing the buildup of harmful gases: Ammonia and other gases produced by chicken droppings can build up in a poorly ventilated coop, which can lead to respiratory problems and other health issues for your chickens.
- Reducing the growth of dangerous molds, bacteria, and viruses: Proper ventilation helps to reduce the growth of harmful molds, bacteria, and viruses that can thrive in warm, damp environments.
By ensuring that your chicken coop has proper ventilation, you can help to keep your chickens healthy and comfortable.

Insulation
If you live in an area with cold winters, insulating the shed will help keep the chickens warm and comfortable. In our opinion the best way to insulate a chicken coop or winterproof a coop is to make it dry and draft proof. Doing this allows the chickens to use their natural temperature regulatory processes and eliminates the need for alternatives that can cost you money.
Chicken Run
Chickens need an outdoor space that is safe and dry. Providing your chickens with an outdoor space allows them enjoy fresh air. Create a secure chicken run connected to the coop using wire mesh or fencing to protect them from predators. Make sure the run is spacious enough for the chickens to stretch their wings and engage in natural behaviors.

Feeders & Waterers
The Importance of Having Chicken Feeders and Waterers
- Provides Access to Clean Water and Food. One of the most important reasons to have chicken feeders and waterers is to provide your chickens with access to clean and fresh water and food. Chickens need access to water at all times to stay hydrated and healthy, and they also need a balanced diet to lay eggs and maintain their overall health.
- Saves Time and Reduces Waste. Using feeders and waterers can also save you time and reduce waste. When chickens have access to an unlimited supply of food and water, they are more likely to spill and waste it. Using designated feeders and waterers helps to prevent this, which can save you time and money in the long run.
- Helps eliminate pests eating the chicken feed. There are many options for feeders, if you choose one that has to be opened by the chicken it will reduce the amount of feed pests have access to.
By providing your chickens with designated feeders and waterers, you can help to ensure that they have access to clean and fresh water and food, prevent the spread of disease, manage portions, and save time and money.
Conclusion
Converting a metal shed into a metal chicken coop is a rewarding project that provides your flock with a safe and comfortable living space. By following the steps outlined above and giving attention to proper planning, preparation, and construction, you can repurpose an unused structure into a functional coop while enjoying numerous benefits, such as cost savings and repurposing existing resources.
Remember, a well-planned and prepared coop ensures the happiness and well-being of your chickens. We encourage you to share your experiences, insights, and any additional tips you have for converting sheds into chicken coops. Together, we can create a vibrant community of backyard chicken enthusiasts, sharing knowledge and fostering the love for raising chickens in a sustainable and compassionate way.
Happy coop building and enjoy the rewarding experience of creating a beautiful and functional metal chicken coop for your feathered companions!


